Chapter 2: Getting Started
Learning Objectives
Navigating to the OpenStreetMap Website
Know how to navigate OpenStreetMap (search, move, zoom in/zoom out)
Know how to export OpenStreetMap into image and changing layers
Know how to create an account in OpenStreetMap
In this section we will learn step by step how to navigate the OpenStreetMap website, view maps, and sign up for a user account. After you have your OpenStreetMap account, you will be able to contribute your first points to the map.
2.1 Visit the OpenStreetMap Website
Before you begin, be sure your computer is connected to the internet. Then, follow these steps:
Open your web browser. Common browsers are Firefox, Chrome, Opera, or Internet Explorer.
In the address bar at the top of your browser, type www.openstreetmap.org and enter
When the page has finished loading, you should see something like this:
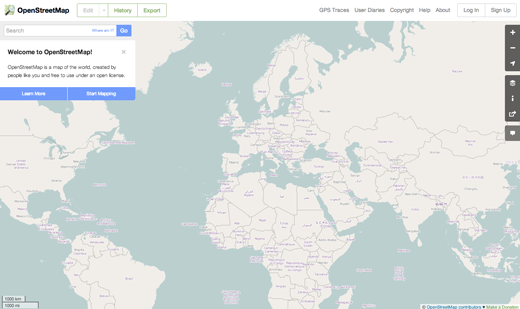
OpenStreetMap Interface
2.2 Navigate the Map
The main thing you should see is the map. Move the map by clicking on it with your left mouse button, holding the button down, and dragging your mouse around (see figure below).

Some Tools in OpenStreetMap
If you have mouse with scroll wheel, you can zoom in and zoom out your map using scroll wheel in your mouse. If you do not have, you can use + and - button at the top right corner on your map.
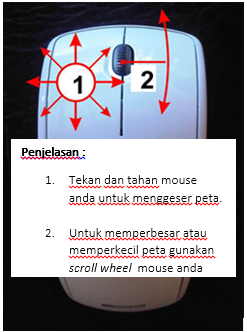
Navigation Instruction Using a Mouse
To search for a place, left-click in the box labeled search on the left side of the page. Type name of your town or village and press Enter. A window should appear to the left of the map with the results of your search. Click on the location that looks like the one you want. The map will automatically re-center on the location chosen from the list.

OpenStreetMap Search Result
2.3 View with Different Map Styles
OpenStreetMap contains geographic data from all over the world. Although it is a single database, the data can be interpreted and styled in different ways. To see this in action, click the layers button at right side in your map window.
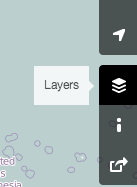
Layer Button to change layers in OpenStreetMap
Click on the different layer options for the map. Each layer has a different style. For instance, the Transport Map emphasizes transportation routes such as roads and bus stations, while the Humanitarian Map emphasizes public facilities such as schools, hospitals and government offices. All of these views are possible because of the structured data contained in the OSM database. See the figure below for a comparison of the Transport Map and the Humanitarian Map.
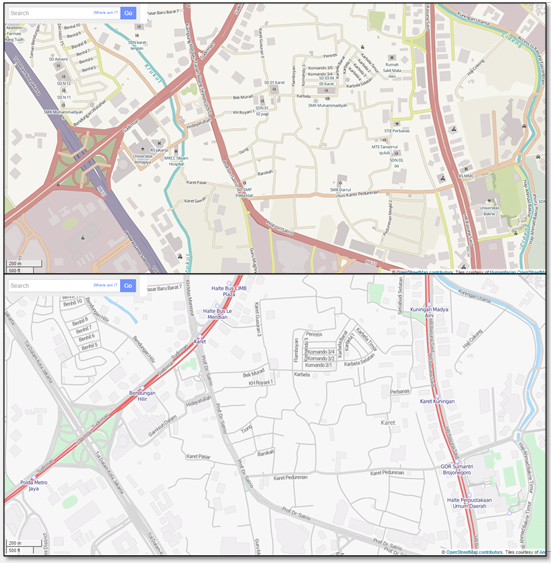
(Top) Humanitarian (Bottom) Transport Map
2.4 Export Map into Image
In addition to changing the layers in OpenStreetMap, you also can export your map as an image. The steps are as follow:
Click the Share icon at your right side on your map window, as shown in the figure below:
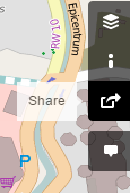
Share Button in OpenStreetMap
After determining the area that want to be exported, tick Set custom dimensions box and adjust size of the area that you want to export. You also can change the scale.
When you are finished adjusting the size of the download area, click download
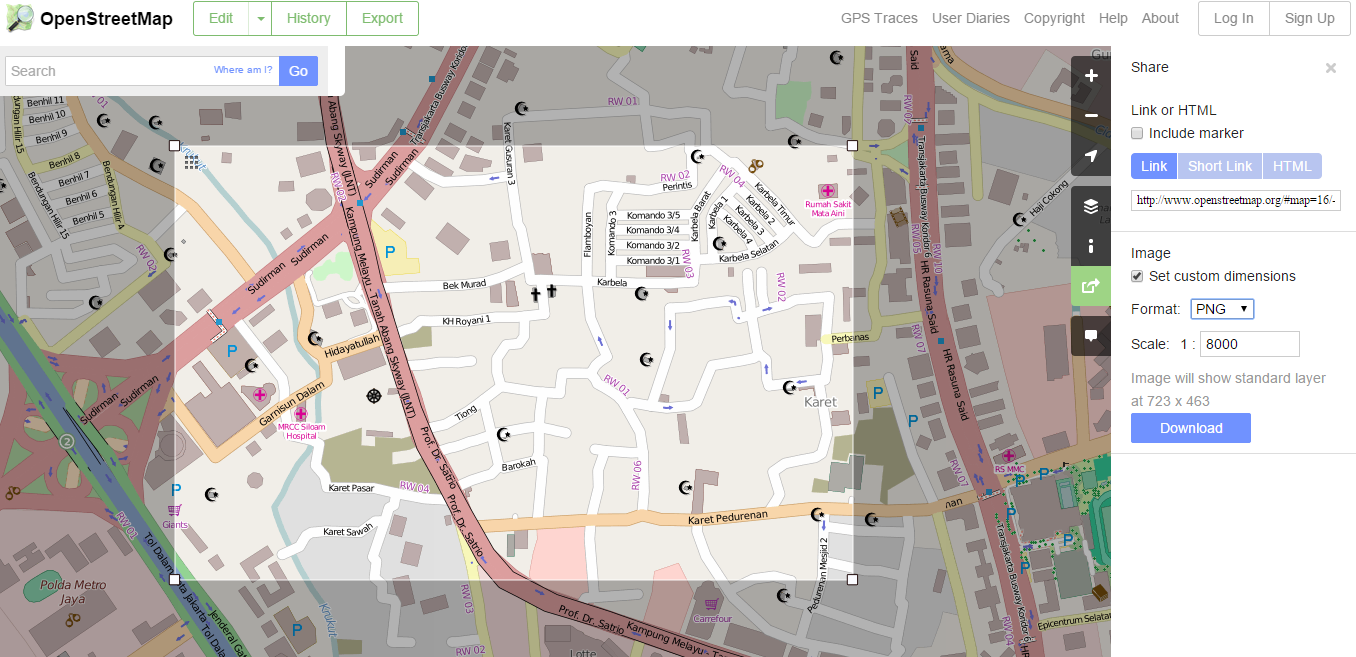
Export Map in OpenStreetMap
2.5 Create an Account in OpenStreetMap
Now that you have seen what the main website looks like, you’re now ready to learn how to create an account in OpenStreetMap and make your first additions to the map. The steps are as follows:
On the OpenStreetMap website, click sign up in the top right corner of the page.
You should see a new page that looks like the figure below:
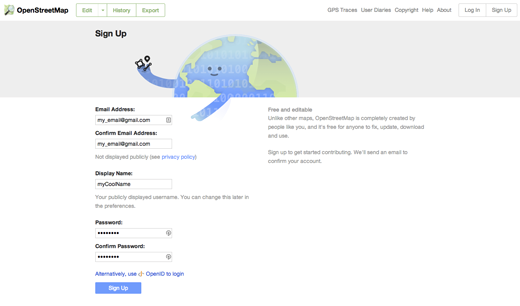
Interface to make account in OpenStreetMap
There are five boxes on this page that you need to fill in to register an account with OSM.
Enter your email address in the first two boxes. You should enter the same email address in both boxes. Later, you will need to open your email to confirm your account with OpenStreetMap.
In the third box, enter the username that you would like to have. Your username will be unique to you, and you will not be able to choose a username that someone else has chosen, so be creative. If you try to enter something simple, like your first name, it is likely that someone has already claimed that name.
Enter a new password in the fourth and fifth boxes. Take care to enter the same password in both boxes. It does not need to be the same as the password for your email.
You may want to write down your OSM username and password. You will need it to log in later.
After you have completed all the boxes, click Sign Up at the bottom of the page.
Open a separate window or tab in your internet browser, and open your email.
Enter your email address and your email password to open your email.
If everything was successful with your registration, you should see an email from OpenStreetMap in your inbox. Open the email. It should look like the image below. Click on the link that is identified below:
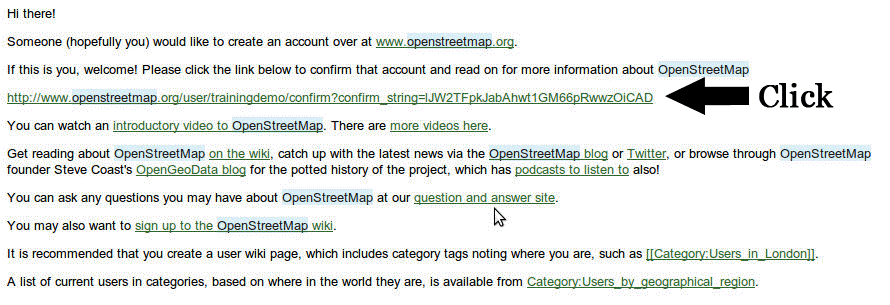
Notification from OSM in your inbox
A new tab or window will open. You now have an OSM account!
On the OpenStreetMap page, click Sign Up in the top right corner. Enter your OpenStreetMap username and password and press Enter. You should now be logged in. You should see your username in the upper right corner of the page.
Note
If there are any problems, an error message may pop up. Check top make sure that your email is the same in the first two boxes, and your password is the same in the bottom two boxes. If the third box is highlighted red, it means that someone else has already chosen your username, and you should try a different name.
Summary
Congratulations! If all went as expected, you have your own OpenStreetMap account and you know how to navigate the OSM website. In next chapter, we will learn how to add our data into OpenStreetMap using online editor called iD Editor.