
Chapter 7: Field Papers
Learning Objectives
How to use Field Papers
Make and print Field Papers
Add data to print using Field Papers
Scan and upload Field Papers to Field Papers website
Open Field Papers into JOSM
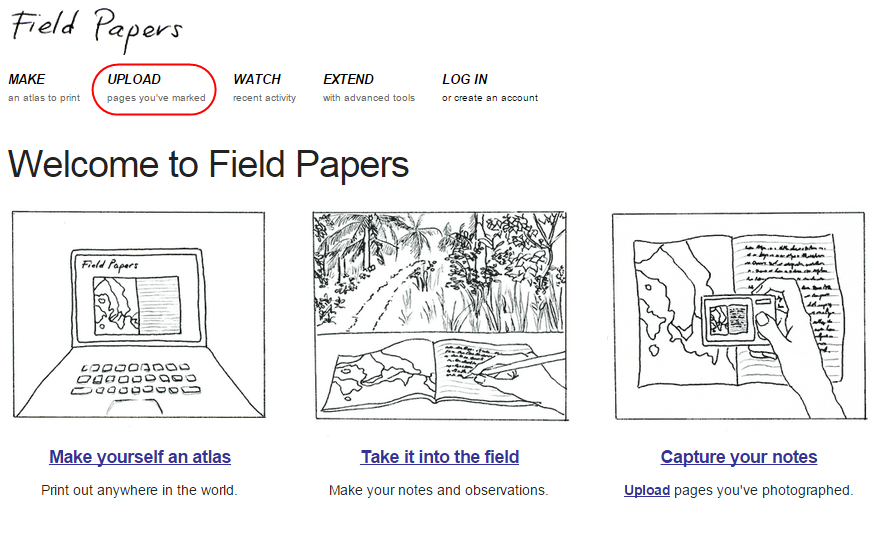
In this module we will see how we can record the coordinates of places without a GPS. We will use a paper-based tool called Field Papers, which allows you to print a map of an area, draw on it, add notes, and load the paper back into JOSM, where you can add your locations to OpenStreetMap.
7.1 Overview of Field Papers
Before going into detail about Field Papers, let’s look at a general overview of how the Field Papers process works:
Locate the area of interest you want to map on the Field Papers website. Create a map for the area of interest. Print out a map of this area. You can choose to print the area of interest using the default OpenStreetMap backdrop, or you may choose to print aerial imagery, if it is a available in your area.
Interface Field Papers
Use your printed map to survey the area. Add more places by drawing them on the map. Draw lines for roads, shapes for buildings, and so forth. Write notes about each location directly on the map, or write numbers on the map that relate to numbers in your notebook, where you can write more detailed information about each object.
Scan your paper into the computer. If you do not have a scanner, you can take a photograph of the paper, if your camera is able to take high quality pictures. Upload the image to the Field Papers website.

Field Papers Image
In JOSM, load the Field Papers. Use the objects you drew as a reference to add the digitally into OpenStreetMap.

Interface Field Papers in JOSM
7.2 How does Field Papers Work?
If you follow the Field Papers process described above, you will be collecting accurate geographic coordinate of places with nothing more than paper. How is this possible?

Barcode Field Papers
When you print a Field Papers, the paper comes with a square barcode on the bottom of the page. This barcode allows Field Papers to determine the exact location of the map that you are using to survey. Later, when you load the paper back into JOSM, all the objects that you drew will be in shown relative to their actual locations. This is same with you using GPS for collecting actual coordinates, except all you need is paper!
Now let’s learn how to create and use Field Papers.
7.3 Create and Print Field Papers
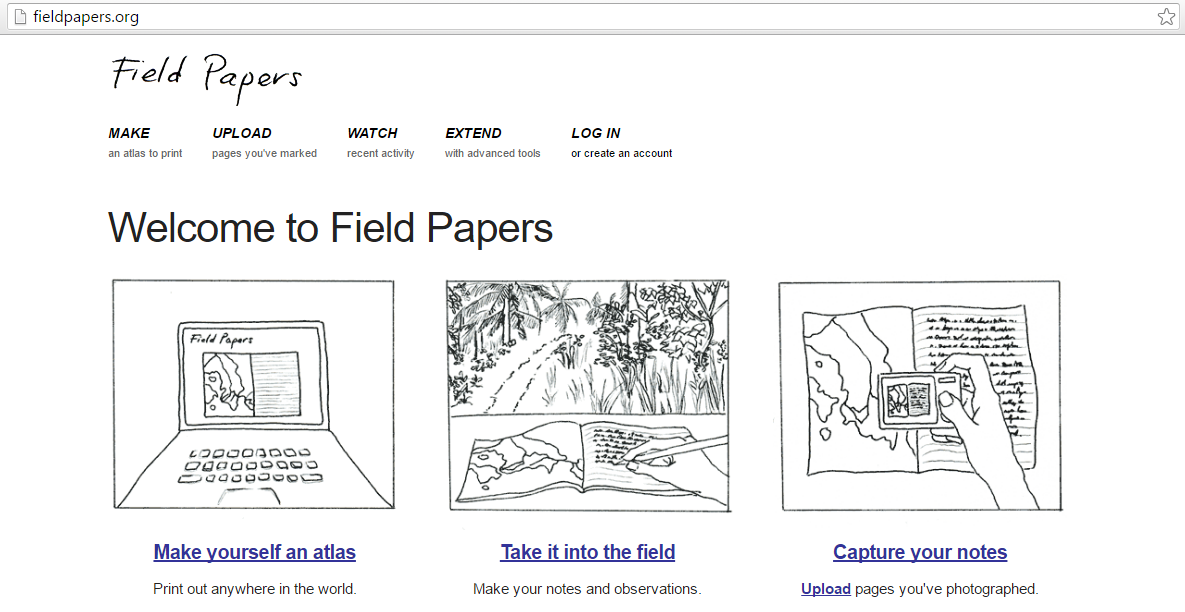
Open your web browser. In the address bar at the top of the window, enter http://fieldpapers.org/ and press Enter
The website should look something like the figure below:
Interface Field Papers
Click Make yourself an Atlas to select the area that you want print out.
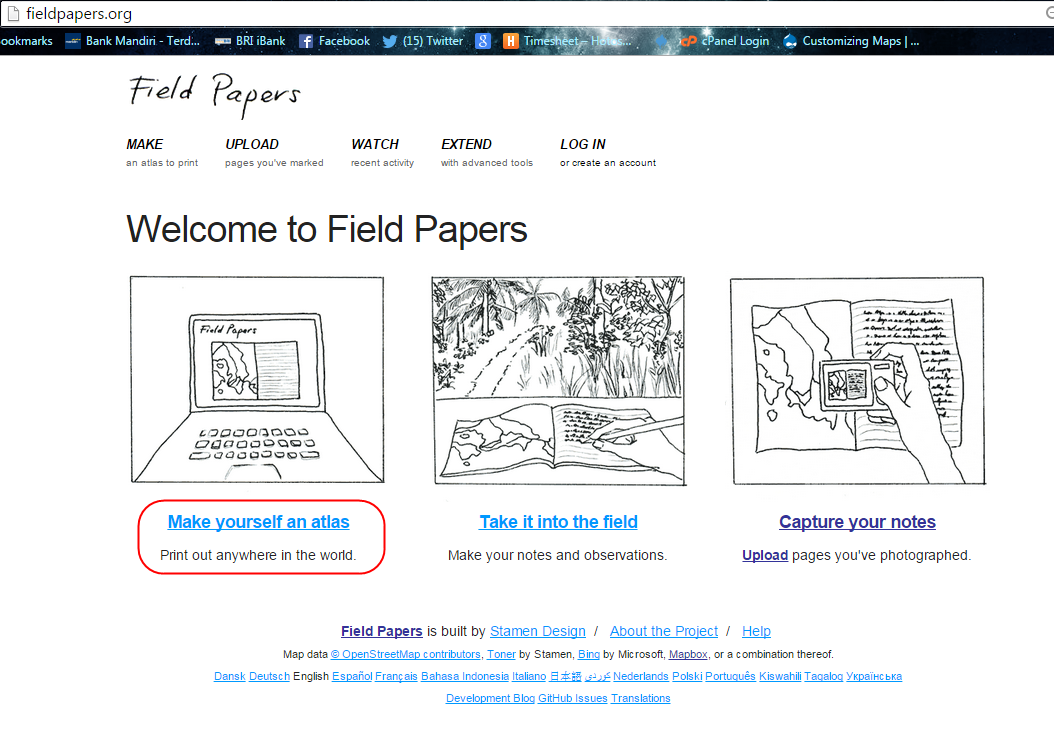
Make Field Papers
You will be directed to a page like this where you can see there are some setting at left panel and main map at the right.

Compose Field Papers
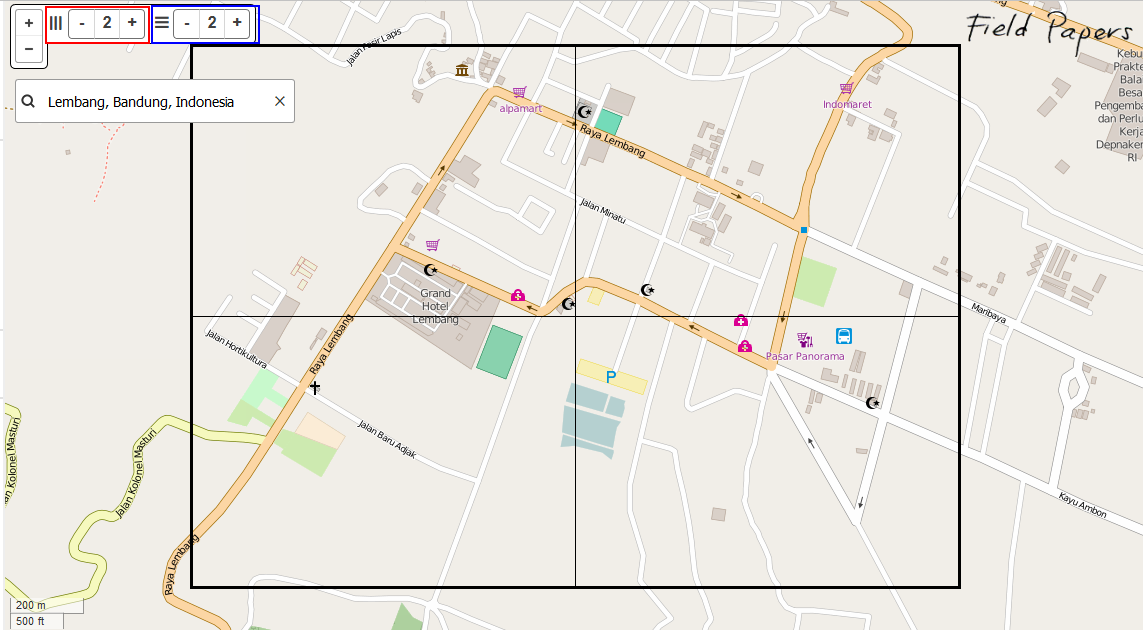
On the main map, to find the area that you want to map, you can click search button and type the location name OR you can drag manually the map with the same way when you drag map in OpenStreetMap website, use the left button your mouse for drag map, and scroll your mouse for zoom in and zoom out. Click on + and - buttons in the upper left corner for zoom in and zoom out.
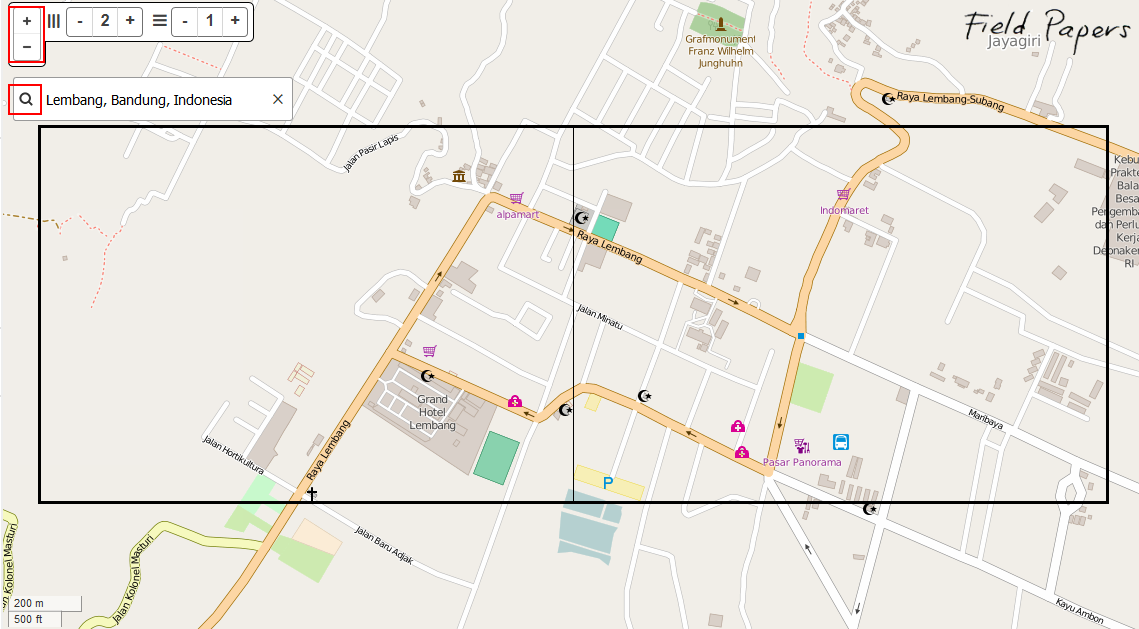
Setting the area in Field Papers
Here you also can define the boundaries of your Field Papers. The boundaries is displayed as hollow box with black border. You want to make sure that the window displays the area of interest that you intend to map. You can add more page or less page. Make sure that your map can display building and road for field survey.
Setting the page in Field Papers
At the left panel are some setting for print out Field Papers. The first is give information to your atlas by type a name on the Atlas Title column. If you want, you can add notes to be printed on the map, such as questions you want to remember to answer or specific places you want to identity by give a check mark on Print notes and type your notes on the Notes column.
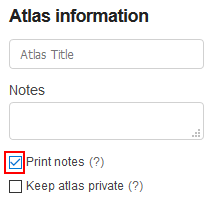
Setting atlas information in Field Papers
The second is the Grid Layout setting. The Paper Size is used to adjust the paper size that you want use for print out Field Paper. You can choose letter, A3, or A4. Then the Orientation is used to adjust the paper orientation that you want use for print out Field Paper. You can choose between portrait or landscape as shown in the figure below.
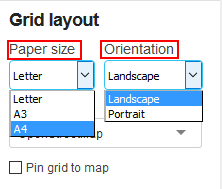
Setting the paper size and paper orientation in Field Papers
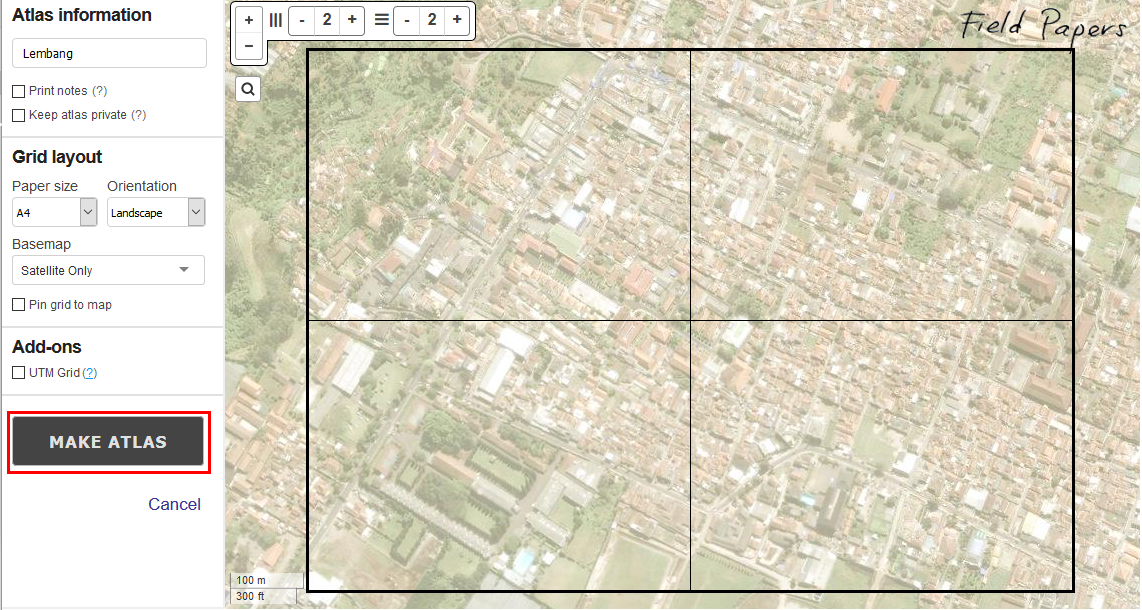
Still in Grid Layout setting, next you can select the type data for your Field Papers. You can select different Basemap for change map background. In this example shown in the figure below, we will select Satellite Only.
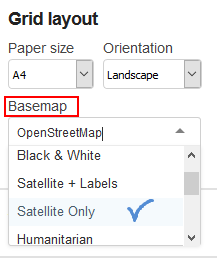
Setting Map Background on Field Papers
When you’re finished, click MAKE ATLAS
Next step to create Field Papers
It may take a few minutes to prepare your final Field Papers map. When finished, you will see your Field Paper on this page, shown in the figure below.
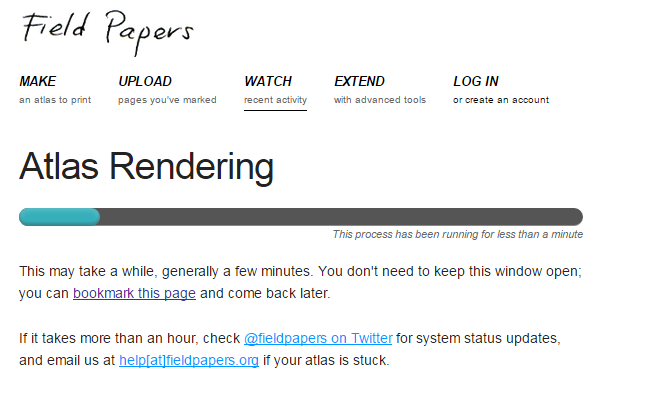
The process preparing Field Papers
When your print is ready, Click Download PDF. The Field Paper should begin downloading. If it loads in your browser, you may need to save it by going to .
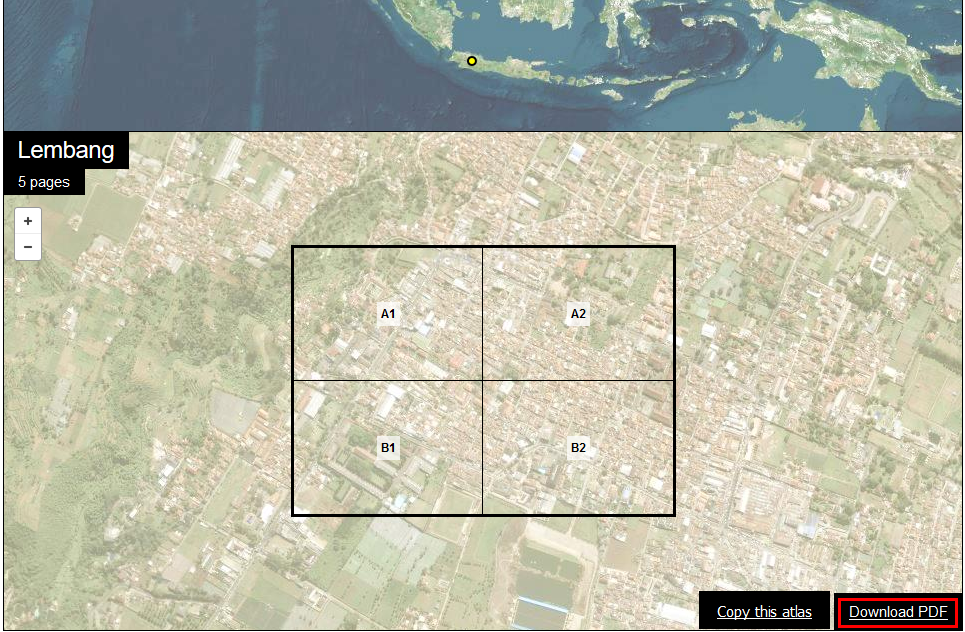
Download Field Papers
When the download is finished, open the PDF file. Connect your computer to a printer and print the page. If everything goes well, you should now have map printed on paper.
7.4 Mapping with Field Papers
Take your Field Papers outside, and use it as a guide to walk and identify new places that are not on the map.
Draw lines for roads, shapes for buildings, and so forth. Write notes about each location directly on the map, or write numbers on the map that relate to numbers in your notebook, where you can write more detailed information about each object.
When you are satisfied with your additions on the paper map, then you can add them digitally into OpenStreetMap.
7.5 Scan and Upload Field Papers
Field Papers are very useful for mapping with nothing more than paper, but they are not a 100% solution. We will still need to load our paper map into JOSM, add our information digitally, and save our changes on OpenStreetMap.
The first step is to scan your Field Papers into your computer. You can do this by attaching a scanner to your computer, scanning the paper, and saving it as an image file. If you don’t have a scanner, you can take a photography of the paper, but you should be careful to take a very good photo. Make sure that the paper is flat and your camera is directly in front of it. Be sure to include the barcode in the image, as Field Papers will not work without it. Here is an example of a scanned/photographed image:
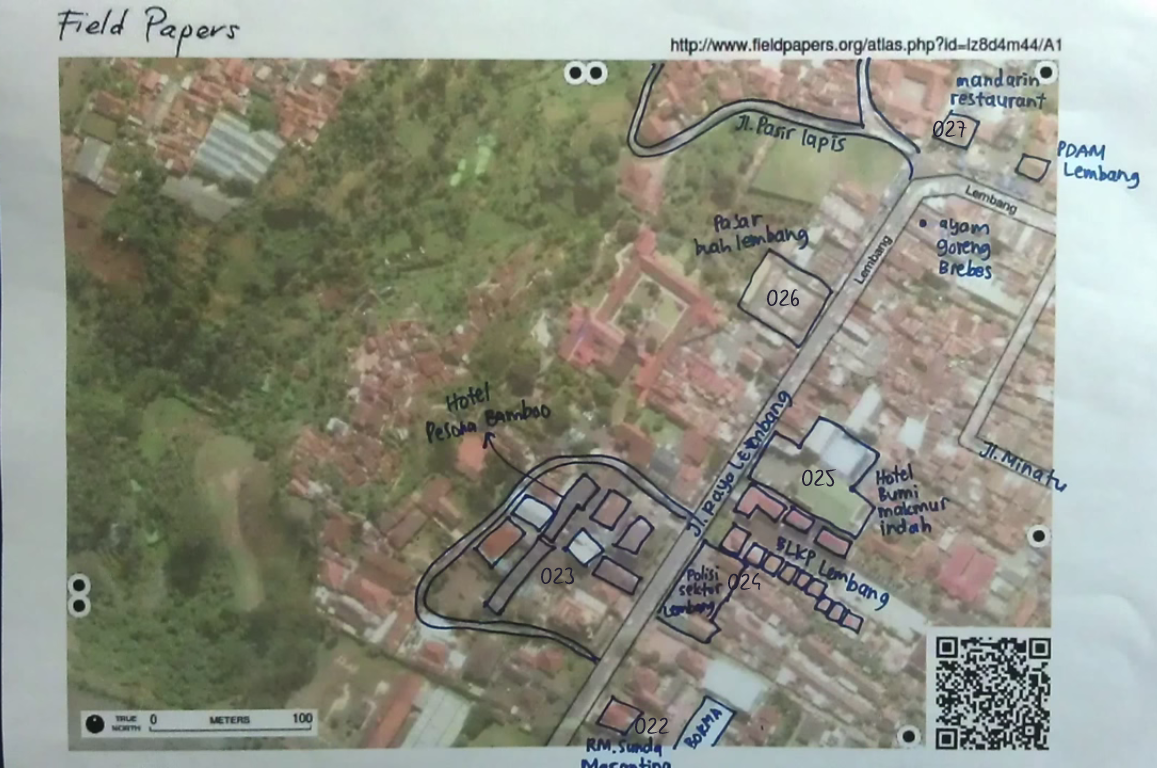
Field Papers Image
Once you have your Field papers scanned and saved on the computer, open your web browser and return to Field Papers website just as before.
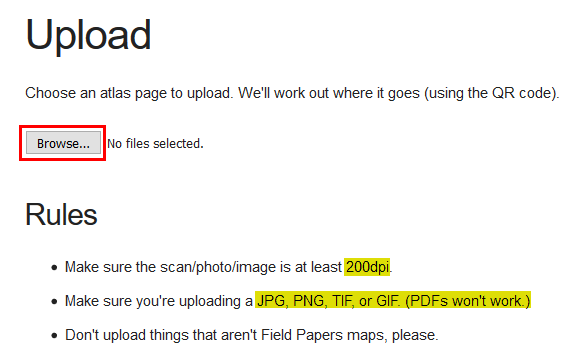
Click the Upload tab at the top of the page.
Upload Field Papers
Click Browse… and navigate to the file where you scanned/photographed your Field Papers.
Select the to be uploaded to Field Papers website
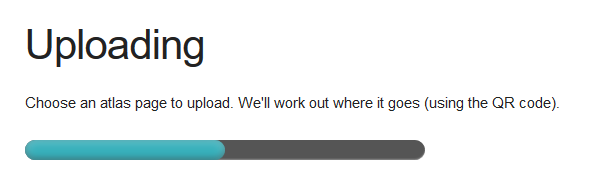
It may take a few minutes for your paper to upload, depending on the speed of your connection.
Field Papers uploading process
When the upload finished, you can see the page interface as in the figure below:
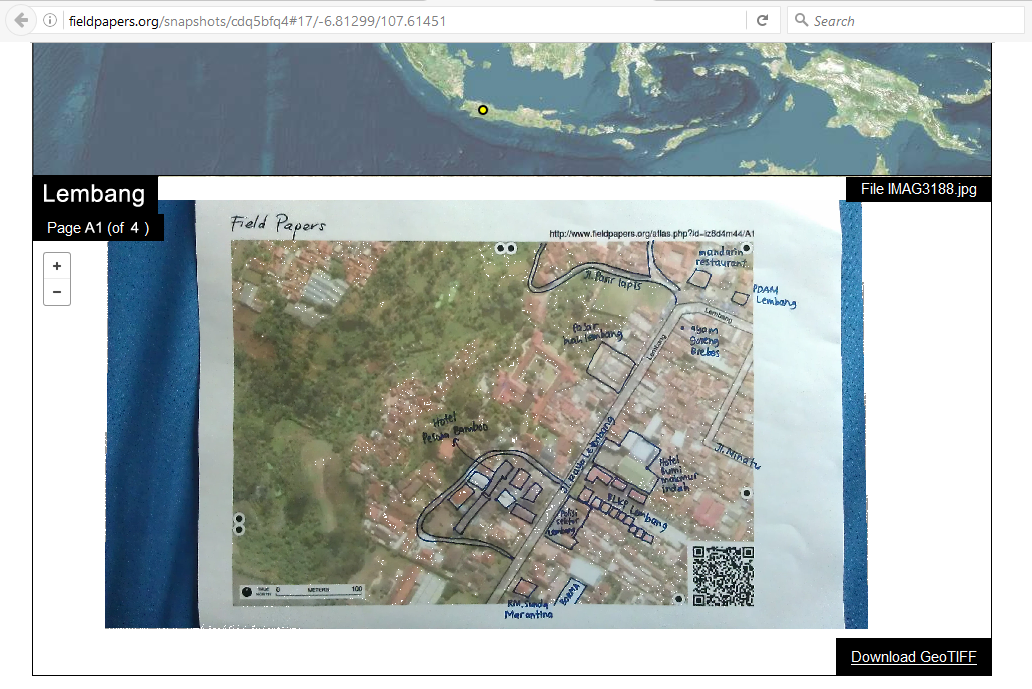
The result from upload Field Papers
7.6 Add Plugin Field Papers
Before we open Field Papers in JOSM, we need install the Field Papers plugin. The fieldpapers plugin enables JOSM to open Field Papers that have been uploaded to the Field Papers website. The Field Papers will be used as background, and we open it using the same procedure for opening satellite imagery in JOSM.
Open JOSM and go to .
Click on Plugins tab.
Type fieldpapers in the Search box. After you find it, tick the fieldpapers box and Click OK as shown in the figure below.
Field Papers Plugin
Restart JOSM so the plugin loads.
7.7 Open Field Papers from JOSM
Now you can add the results of your scanned Field Papers to JOSM and add your information to OpenStreetMap. Return to the Field Papers website in browser address bar.
Click Watch – move your mouse to the bottom and click Snapshots until your browser page looks like the figure below:

List Field Papers in Snapshots
To open Field Papers in JOSM, we need copy the photo ID from the Field Papers that have been scanned. We can get the ID from the snapshot URL at the Field Papers website. Click on the image until the url appears as shown below, then copy the URL for example: http://fieldpapers.org/snapshots/cdq5bfq4#17/-6.81299/107.61451
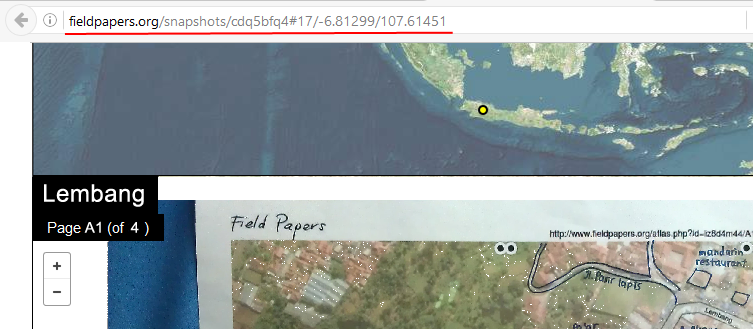
URL from Snapshot Field Papers
Copy the URL by selecting it and pressing CTRL + C.
Open JOSM and make sure the Field Papers plugin is listed in the menu on the top of toolbar. Click

Field Papers Menu in JOSM
Then paste the URL that we have copied from the Field Papers site by pressing Ctrl + V on your keyboard.
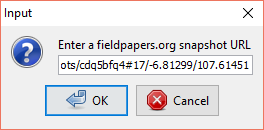
Input Field Papers URL in JOSM
Click OK.
If everything goes well, the Field Papers will open in JOSM. The next module, we can see how to add objects from the scanned Field Papers to OpenStreetMap.
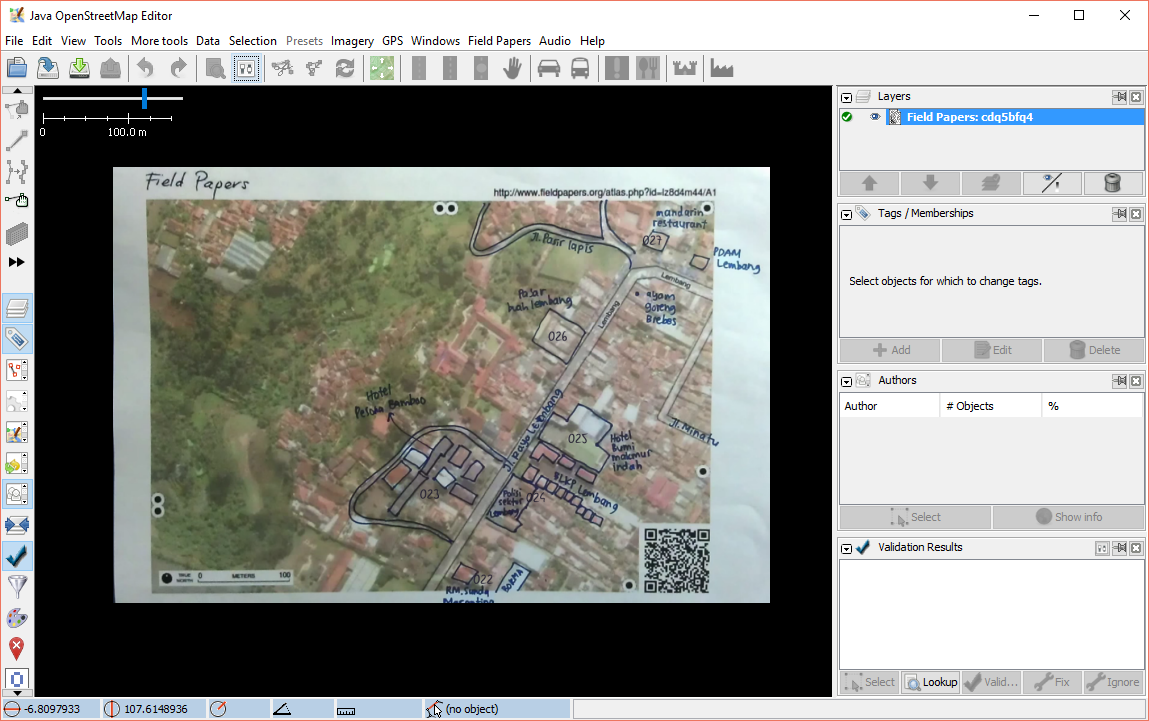
Interface Field Papers in JOSM
Also note that you can use scanned Field Papers in other online editors such as ID Editor or Potlatch2 by clicking the link Edit in… ID or Edit in… Potlatch on page Field Papers that have been scanned.
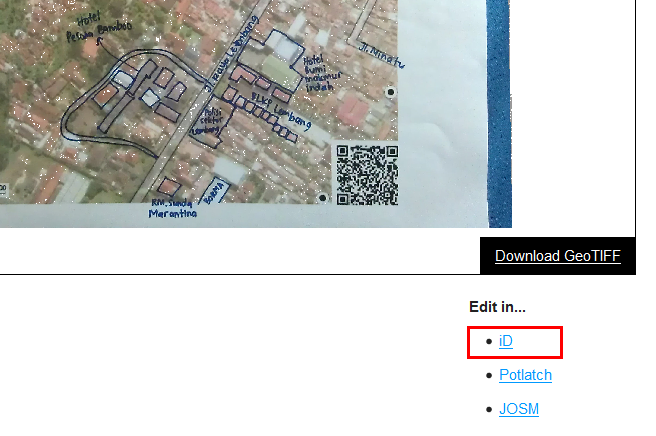
Editing Field Papers with iD Editor
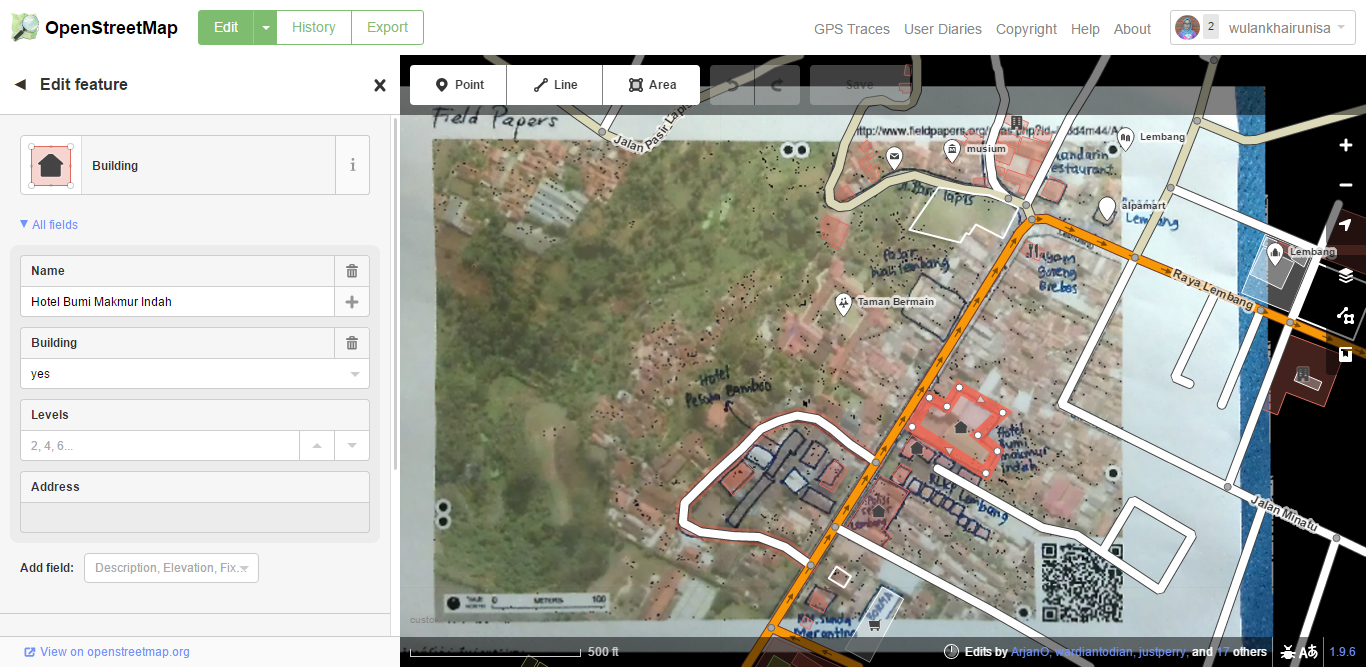
Interface Editing OSM data on iD Editor
Excercise!
After you add your changes to OSM, they will be saved to the OSM servers. When you want add some information to your map, you can print a Field Paper that includes the changes you made. As this process is repeated, and you acquire more details, the map will steadily improve!
Summary
In this module, You have learned how to use Field Papers and how Field Papers works as a data collection device. You have learned how to print, mapping, and scans Field Paper, and how you can use them to improve OpenStreetMap.