
Chapter 10: Imagery Offset
Learning Objectives
Understanding definition of Imagery Offset
How to adjust the Imagery Offset
10.1 Overview of Imagery Offset
Using aerial imagery is the most widely used approach to mapping in OpenStreetMap. Mappers typically use Bing Satellite, or imagery from another provider as a background layer while mapping. We have already seen this in previous sections.
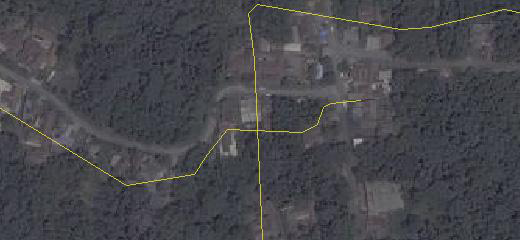
Imagery providers usually do a pretty good job of georeferencing their imagery, but occasionally the images can be out of position. This is particularly true in hilly or mountainous areas, where it can be difficult to stretch a flat image over an area of the Earth with many contours. When you load imagery in JOSM, it can sometimes be ten meters or more from its true position. This is called imagery offset.
We’ve learned about two major ways of making maps – one is by utilizing aerial imagery to identify features on the ground, and another is by using GPS to record tracks and waypoints and then add them to OpenStreetMap. The advantages of aerial imagery is obvious. It is easier for you to see the whole picture, to observe various details from the image, consider your knowledge of the area, and easily trace roads, buildings, and areas.
One key advantage of GPS, is that it doesn’t suffer from offset like imagery. A GPS will always provide you with a correct latitude and longitude. The only exception is when the satellite signals are interrupted by high buildings and mountains, but in this case it is easy to recognize the error. Showing the GPS track in this image, compared with Bing aerial imagery layer in the below figure:

Imagery Offset
It is clear that the GPS track is likely to be accurate and the satellite imagery beneath it is out of place.
So now we must ask, “if the imagery may be out the place, how can we still use it and make accurate maps?”
10.2 CORRECTING IMAGERY OFFSET
The best references for adjusting imagery are GPS tracks that follow roads. And the more GPS tracks that you have to reference, the more accurate you will be able to align your imagery. Since OpenStreetMap users often upload their GPS tracks to the OSM database, we can download them and use them to align our imagery.
Click on the Download button.

Check the box next to Raw GPS Data near the top of the Download window. Select your area and click Download.

This will download an additional layer to JOSM containing GPS tracks. Depending on how many tracks have been uploaded by OSM users, you may see few tracks (or even no tracks):
Imagery Offset
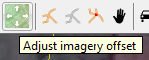
To adjust an imagery layer, click on the Adjust imagery offset button at the top of JOSM.
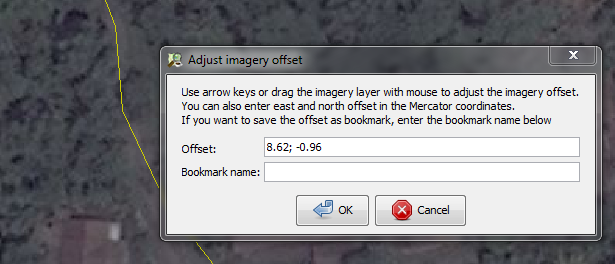
Ignoring the box that pops up, use your mouse to drag the imagery layer so that it aligns correctly with the GPS tracks. The GPS tracks should line up with the roads on the imagery as closely as possible. You will see the offset numbers in the box change.
Setting Imagery Offset
If you like, you can save these offset settings by entering a bookmark name and then clicking OK. You can then automatically apply the same settings later by going to and clicking on your bookmark.
If you do not want to save the offset, simply click OK without entering a bookmark name.
What if there are no GPS tracks on OpenStreetMap, and you don’t have a GPS? Without GPS tracks, it is difficult to align imagery. If it is a relatively empty area (not much mapped), you might choose to simply use the imagery as it is and correct the data later.