
Chapter 9: Inserting Special Tag in JOSM
Learning Objectives
Be able to insert tag in iD Editor
Be able to insert tag in JOSM
Understanding standard tags that are used in OpenStreetMap
You understand how to add data in OpenStreetMap and how to maintain the quality of existing data so that we can contribute better. In this training we want the objects that we mapped in OpenStreetMap to also appear as an article in Wikipedia. Therefore we need to insert some special tags so that later, articles based on mapped objects, can be uniformly displayed and in accordance with applicable rules.
9.1 Inserting Tag in iD Editor
When we want to add special tags in iD Editor we must ensure that we are connected to the Internet. Here are the steps for inserting a tag in iD Editor.
Open the site: www.openstreetmap.org
Sign in with your OSM account
Select edit with iD Editor
Select object that you want to add the tag
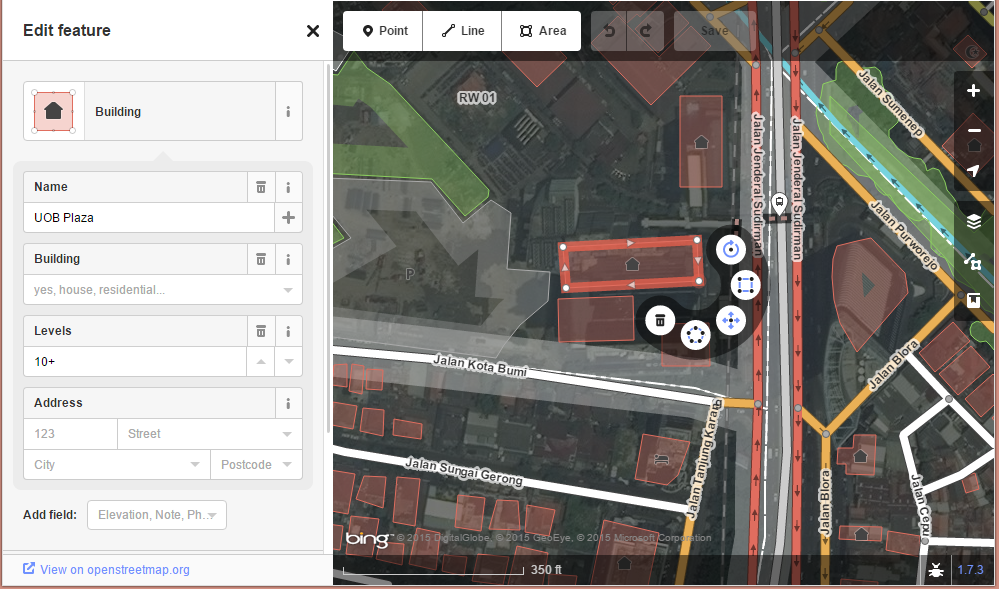
Display of tag in iD Editor
Then select All tags and click + and add tag that you want.
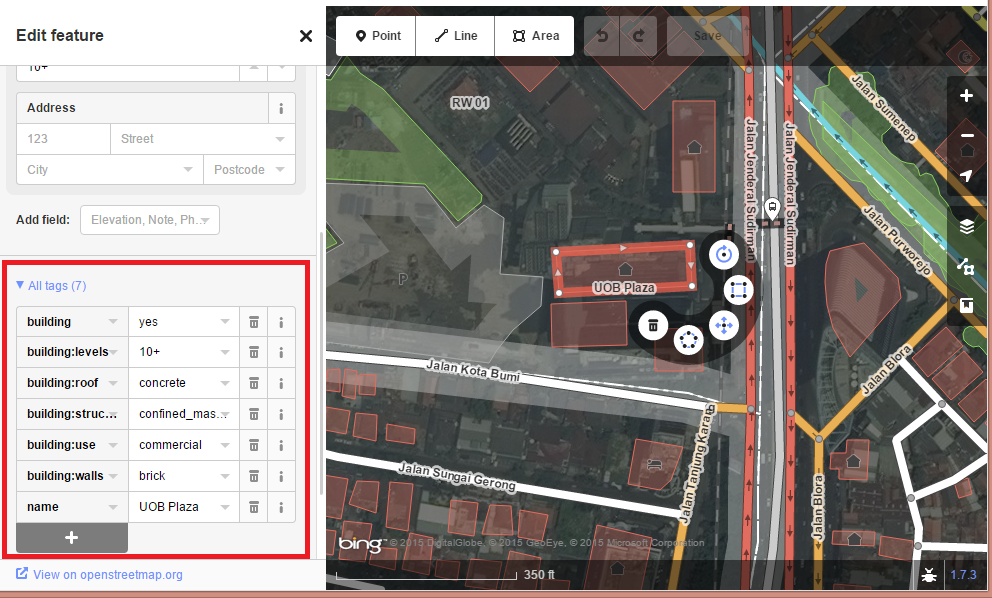
Tag box in iD Editor
After that, let’s Save your changes.
9.2 Inserting Tag in JOSM
Besides inserting a special tag to the object using iD Editor we can also insert the tags to objects using JOSM. Basically inserting tags in JOSM almost equal to iD Editor. Here are the steps:
Open JOSM in your computer/laptop
Download area you want to edit
Select the object you want to add tags
Then click Add on properties box on the right side as shown in the figure below
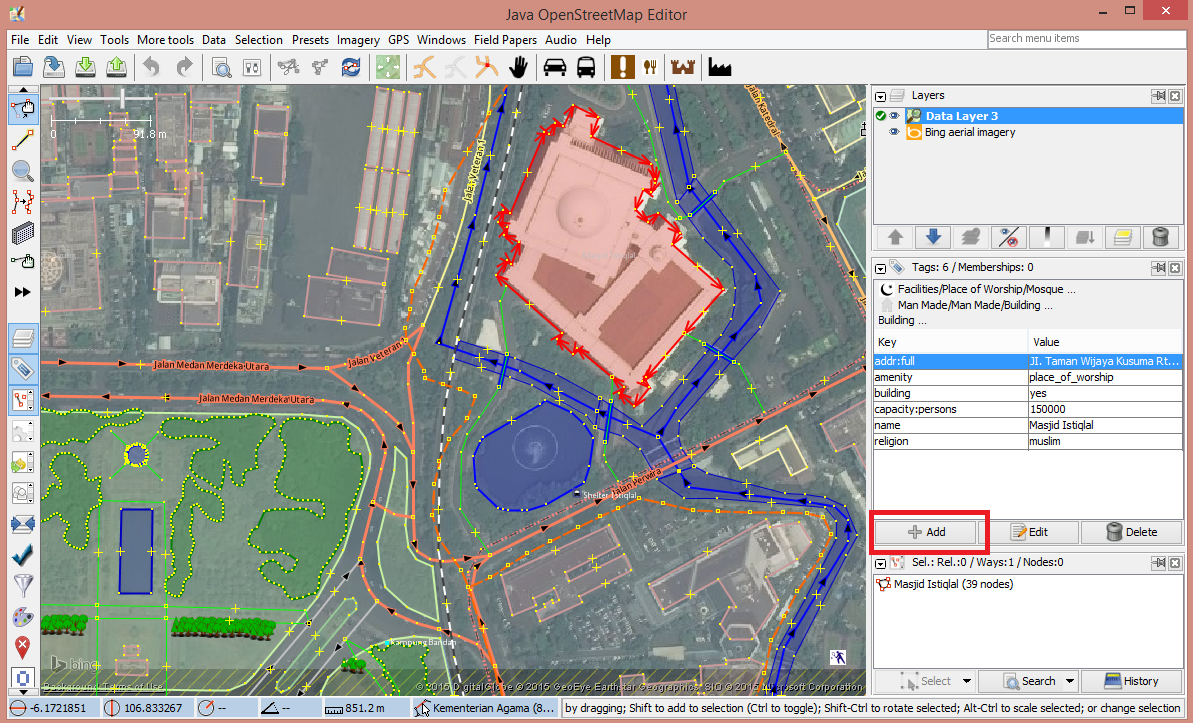
Adding tag in JOSM
Type the tag that you want to use as shown in the figure below:
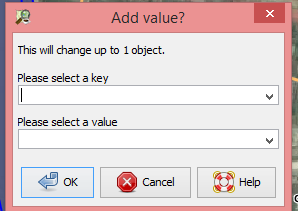
Adding key and value box
Then click OK
9.3 Presets Standardization
OpenStreetMap allows all users to provide as many details as they can about their map. This information can be imprinted on each object using the menu presets available on OSM editor. We often find inconsistencies in the provision of information on various objects. Therefore the presets help standardization and uniformity of data.
Menu Presets are made for these purposes:
To ensure the stability (consistency) of data
To facilitate the search and processing data
As a benchmark in the provision of information through the presets
As a reference if you want to make improvements or validate the data
Maximizing the use of existing Internal Presets in JOSM
Maximizing data visualization on OpenStreetMap website
By using presets, standardization is enforced for all OSM users that use the standard menu preset when editing the map. One of the advantages of using internal presets that are already available in JOSM is the object visualization will render correctly on the OSM website.
To see standardized features used in JOSM menu presets please visit the following address: http://wiki.openstreetmap.org/wiki/Id:Map_Features
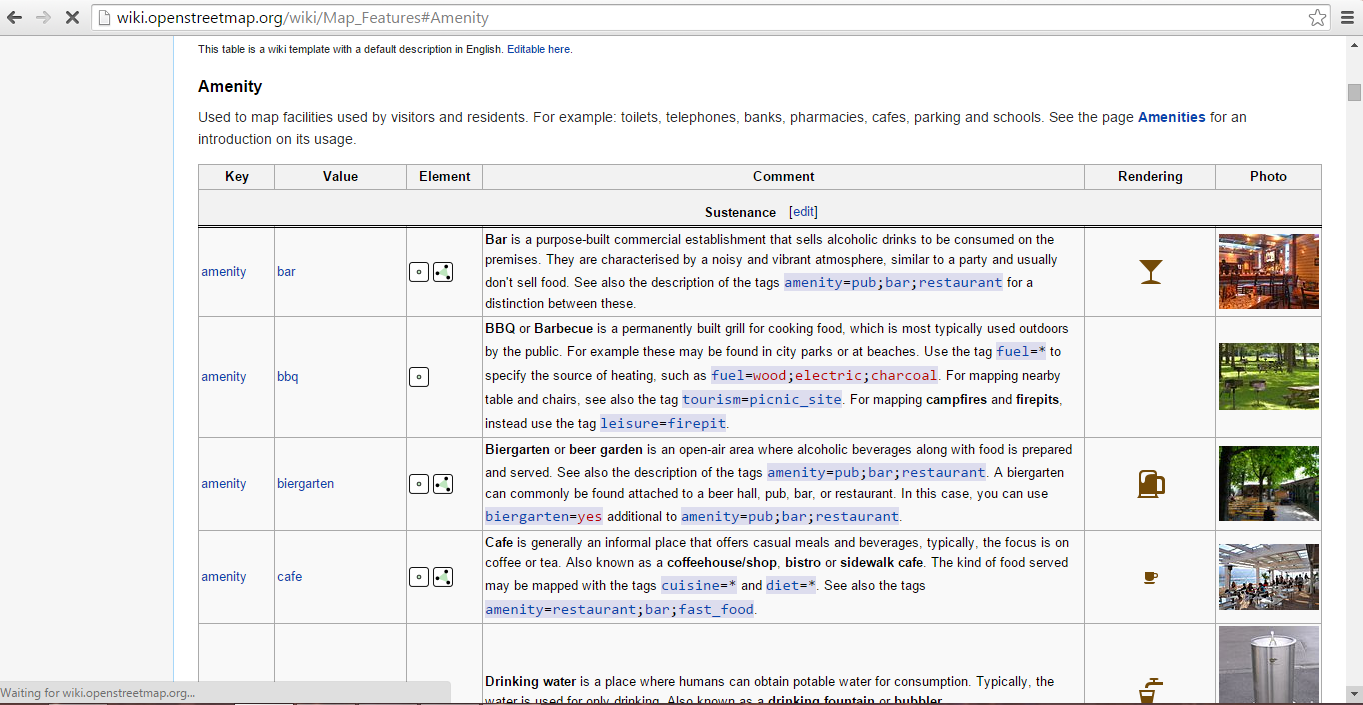
Amenities list in Wiki OSM
Here are some informations that you should put into this project:
Building
Building name (key : name)
Ownership (key : operator)
Building type (key : amenity)
Building level (key : building:levels)
Address (key : addr:full)
Reference (key : source:ref)
Highway
Highway name (key : name)
Ownership (key : operator)
Highway type (key : highway)
Reference (key : source:ref)
Highway width (key : width)